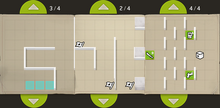
Buildings are built inside your camp where your survivors live. They can send you into missions, unlock new buildings, produce resources required to upgrade your buildings and survivors, upgrade your equipments, heal injured survivors, help you find more survivors, and stock resources.
To be able to advance in the game the camp needs to develop with new and upgraded buildings. Each upgrade will spend some real time and supplies (all costs on this page are "canned goods" instead of XP. XP is used for Survivor and Weapon upgrades). Upgrades may also be done instantly with Gold; either immediately without spending any supplies, or later with a reduced payment of gold.
During upgrade there will be a timer showing the remaining delay. It's only possible to upgrade one building at a time. Normally you can't use a facility if it's upgrading nor upgrade while it's in use (e.g. training in camp or healing in hospital). The Mission Car is an exception, you will be able to go on missions also during car upgrade.
There is a certain amount of strategy in the choice of how to spend resources and what to upgrade first, but the game advancement in itself hints what you need by blocking and unlocking upgrades. The core building is your Council trailer, the level of which determines the maximum level the other buildings may be upgraded to.
When selecting a building you can see info, upgrade or interact (e.g. harvest supplies or visit hospital). It's also possible to drag the building freely on the map. There is no charge for such movement but you can cancel it by pressing the cross.
There is currently no way of scrapping unwanted buildings (and there would not be any advantage to do so), but you can clear out junk.
Player Level
You will automatically advance to the next Player Level when you have reached enough Building Points (BP) on the current level. Player level is visible in a circle on the top left corner icon in Camp, tapping it will also show the details on current and needed BP.
Upgrade buildings in the Camp to increase BP at amounts specified in Building tables on this page (not listed in the game but you can calculate it by subtracting "BP before upgrade" from "BP when completed"). Certain player level is required for upgrading your Council (see Council table), in turn unlocking other building upgrades.
| Player Level |
Building Points (to advance) |
|---|---|
| 1 | 10 |
| 2 | 11 |
| 3 | 18 |
| 4 | 20 |
| 5 | 21 |
| 6 | 47 |
| 7 | 52 |
| 8 | 56 |
| 9 | 65 |
| 10 | 71 |
| 11 | 77 |
| 12 | 123 |
| 13 | 135 |
| 14 | 147 |
| 15 | 117 |
| 16 | 128 |
| 17 | 140 |
| 18 | 197 |
| 19 | 217 |
| 20 | 237 |
| 21 | 230 |
| 22 | 253 |
| 23 | 275 |
| 24 | 391 |
| 25 | 429 |
| 26 | 400 |
| 27 | 413 |
| 28 | 378 |
| 29 | 431 |
| 30 | 456 |
| 31 | 456 |
| 32 | 521 |
| 33 | 526 |
| 34 | 578 |
| 35 | 630 |
| 36 | 748 |
| 37 | 822? |
| 38 | 770 |
| 39 | 790? |
| 40 | 733 |
| 41 | 799 |
| 42 | 947 |
| 43 | 1040 |
| 44 | 1000 |
| 45 | 1000 |
| 46 | 1000 |
| 47 | 1000 |
| 48 | 1000 |
| 49 | 1000 |
| 50 | 1000 |
| 51 | 1000 |
| 52 | 1000 |
| 53 | 1000 |
| 54 | 1000 |
| 55 | 1130 |
| 56 | 1250 |
| 57 | 1250 |
| 58 | 1250 |
| 59 | 1300 |
| 60 | 1300 |
| 61 | 1400 |
| 62 | 1450 |
| 63 | 1500 |
| 64 | 1600 |
| 65 | 1700 |
| 66 | 1800 |
| 67 | 1800 |
| 68 | 2000 |
Buildings
Council
The council can hold 1500 supplies of food, Xp and unlock new buildings and levels. Current maximum as update 1.7 is lv 16
The cost listed below is for upgrading to that level.
| Level | Player
Level |
Time | Cost | Gold Cost | BP | XP Storage | Buildings unlocked |
|---|---|---|---|---|---|---|---|
| 1 | - | - | - | - | - | - | - |
| 2 | 1 | 15s | 110 | 2 | 6 | 3K | Training grounds lvl 2 |
| 3 | 3 | 30m | 500 | 18 | 14 | 9K | Training grounds 3 New Workshop 1 New Farm plot 1 New Radio 1 New Tent 1 |
| 4 | 6 | 1h 30m | 4K | 49 | 24 | 20K | Memorial New Supply Storage 1 Training grounds 4 Workshop 2 |
| 5 | 8 | 3h | 8.6k | 76 | 38 | 30K | Training grounds 5 Workshop 3 New Farm 1 Mission Car 3 |
| 6 | 11 | 7h 30m | 20k | 116 | 54 | 40k | Training grounds 6 Workshop 4 New Tent 1 Supply Storage 4 |
| 7 | 14 | 9h | 33k | 153 | 74 | 60K | Training grounds 7 Workshop 5 |
| 8 | 17 | 10h 30m | 62K | 219 | 94 | 75K | Supply Storage 5 Radio tent 4 New Farm plot 1 Training grounds 8 Workshop 6 |
| 9 | 20 | 12h | 94K | 291 | 122 | 100K | Farm Plot 7 Training grounds 9 Workshop 7 |
| 10 | 22 | 15h | 160K | 353 | 150 | 150K | Tents 5 Training grounds 10 Workshop 8 Radio tent 5 New Supply storage 1 |
| 11 | 24 | 18h | 300K | 440 | 182 | 200K | Farm plot 8 Mission car 6 Training groungs 11 Workshop 9 |
| 12 | 29 | 21h | 570K | 584 | 216 | 300K | New Farm plot lvl 1 Tents 6 Radio tent 6 Training Grounds 12 Workshop 10 |
| 13 | 32 | 1d | 750K | 689 | 254 | 400k | Training Grounds 13 Workshop 11 Mission Car 7 Hospital 7 Farm Plot 9 Tent 7 Supplies Storage 7 |
| 14 | 34 | 1d 2h | 970K | 791 | 294 | 600k | Training Grounds 14 Workshop 12 Radio Tent lvl 7' Mission Car 7 Hospital 7 Farm Plot 9 Tent 8 Supplies Storage 8 |
| 15 | 36 | 1d 4h | 1.36M | 983 | 338 | 800K | Training Grounds 15 Workshop 13 Radio Tent lvl 7 Mission Car 8 Hospital 8 Farm Plot 10 Tent 8 Supplies Storage 8 |
| 16 | 39 | 1d 6h | 1.86M | 1196 | 384 | 1M | Training Grounds 16 Workshop 14 Radio Tent 8 Hospital 8 Farm Plot lvl 10 Tent 9 Supplies Storage 9 |
| 17 | 42 | 1d 10h | 2.51M | 1500 | 2M | Training Grounds 17 Workshop 15 Mission Car 9 | |
| 18 | 45 | 1d 14h | 4M | 2168 | 486 | 2.5M | Training Grounds 18 Workshop 16 Radio Tent lvl 9 Mission Car 9 Hospital 9 Farm Plot 10 Tent 10 Supplies Storage 10 |
| 19 | 48 | 1d 18h | 5M | 2622 | 542 | 3.25M | Training Grounds 19 Workshop 17 Radio Tent 10 Mission Car 10 Tent 11 Farm Plot 11 Hospital 10 |
| 20 | 59 | 1d 22h | 6.5M | 3299 | 600 | 4.75M |
Training Grounds 20 |
| 21 | 61 | 2d | 12M | 5850 | 650 | 5.50M |
Training Grounds 21 |
| 22 | 63 | 2d | 15M | 7250 | 800 | 6.75M |
Training Grounds 22 |
| 23 (2.10 update) | 66 | 2d | 20M | 900 | 7.25M | Training Grounds 23
Workshop 21 Scavenger 2 |
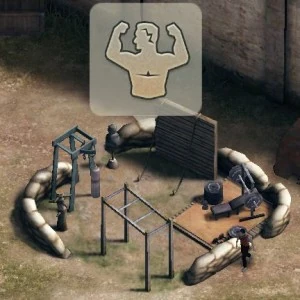
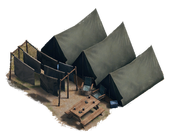
Training Grounds
Train your survivors here, and you can also see what traits your survivor will unlock with an increase in level.
| Level | Time | Cost | Gold Cost | Council level required | BP | Max level survivors |
|---|---|---|---|---|---|---|
| 1 | 3s | 250 | 1 | 9 | 2 | |
| 2 | 5m | 300 | 6 | 2 | 11 | 3 |
| 3 | 1h | 3.2K | 33 | 3 | 19 | 4 |
| 4 | 2h 15m | 7.6k | 51 | 4 | 30 | 5 |
| 5 | 5h | 19k | 94 | 5 | 43 | 6 |
| 6 | 6h 45m | 33k | 135 | 6 | 59 | 7 |
| 7 | 9h | 59K | 201 | 7 | 77 | 8 |
| 8 | 10h30m | 81K | 255 | 8 | 97 | 9 |
| 9 | 12h | 150K | 325 | 9 | 120 | 10 |
| 10 | 15h | 270k | 402 | 10 | 145 | 11 |
| 11 | 18h | 520k | 538 | 11 | 173 | 12 |
| 12 | 21h | 710K | 647 | 12 | 203 | 13 |
| 13 | 23h | 920K | 756 | 13 | 235 | 14 |
| 14 | 1d 2h | 1.26M | 921 | 14 | 270 | 15 |
| 15 | 1d 4h | 1.79M | 1161 | 15 | 307 | 16 |
| 16 | 1d 6h | 2.35M | 1415 | 16 | 347 | 17 |
| 17 | 1d 8h | 3.5M | 1936 | 17 | 389 | 18 |
| 18 | 1d14h | 4.25M | 2279 | 18 | 433 | 19 |
| 19 | 1d18h | 6M | 3068 | 19 | 480 | 20 |
| 20 | 2d | 12M | 5850 | 20 | 500 | 21 |
| 21 | 2d | 15M | 7250 | 21 | 600 | 22 |
| 22 | 2d | 16M | 7716 | 22 | 700 | 23 |
| 23 | 2d | 17M | 23 | 800 | 24 |
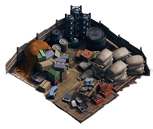
Workshop
Upgrade weapons and armor here, and see what traits will be unlocked by increasing levels of both armor and weapons. This is also where you can scrap Equipment that you don't want and get XP in return.
| Level | Time | Cost (in cans) | Gold Cost | Council level required | BP | Max level equipment |
|---|---|---|---|---|---|---|
| 1 | 1h | 400 | 25 | 3 | 19 | 4 |
| 2 | 2h 15m | 7.6k | 51 | 4 | 30 | 5 |
| 3 | 5h | 19k | 94 | 5 | 43 | 6 |
| 4 | 6h 45m | 33K | 135 | 6 | 59 | 7 |
| 5 | 9h | 59K | 201 | 7 | 77 | 8 |
| 6 | 10h30m | 81K | 255 | 8 |
97 |
9 |
| 7 | 12h | 150K | 325 | 9 | 120 | 10 |
| 8 | 15h | 270k | 402 | 10 | 145 | 11 |
| 9 | 18h | 520k | 538 | 11 | 173 | 12 |
| 10 | 21h | 710K | 647 | 12 | 203 | 13 |
| 11 | 23h | 920k | 756 | 13 | 235 | 14 |
| 12 | 1d 2h | 1.26M | 921 | 14 | 270 | 15 |
| 13 | 1d 4h | 1.79M | 1161 | 15 | 307 | 16 |
| 14 | 1d 5h | 2.35M | 1415 | 16 | 347 | 17 |
| 15 | 1d10h | 3.5M | 1936 | 17 | 389 | 18 |
| 16 | 1d14h | 4.25M | 2279 | 18 | 433 | 19 |
| 17 | 1d18h | 6M | 3068 | 19 | 480 | 20 |
| 18 | 2d | 12M | 5850 | 20 | 500 | 21 |
| 19 | 2d | 15M | 7250 | 21 | 600 | 22 |
| 20 | 2d | 16M | 7716 | 22 | 650 | 23 |
| 21 | 2d | 17M | 23 | 700 | 24 |
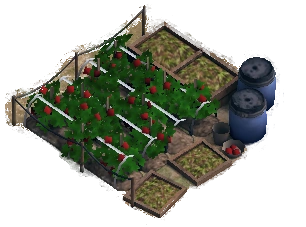
Farm plot
Farm plot produces supplies for upgrading buildings. They are unlocked at council's level X, 3, 5, 8, 12, 17.
Note: Level 1 farm plots cost 80 supplies after the first one
| Level | Time | Cost | Gold Cost | Council level | BP | Supplies/hour | Storage |
|---|---|---|---|---|---|---|---|
| 1 | 3s | 50 (or 80) | 1 | 1 | 3 | 60 | 240 |
| 2 | 3m | 100 | 3 | 2 | 4 | 110 | 440 |
| 3 | 10m | 400 | 9 | 2 | 9 | 200 | 1200 |
| 4 | 45m | 2800 | 28 | 2 | 16 | 340 | 2040 |
| 5 | 4h | 17K | 83 | 5 | 36 | 540 | 4320 |
| 6 | 6h | 56K | 172 | 7 | 64 | 800 | 6400 |
| 7 | 11h | 140K | 312 | 9 | 100 | 1100 | 13.2K |
| 8 | 15h | 430K | 474 | 11 | 144 | 1500 | 18K |
| 9 | 21h | 860K | 713 | 13 | 196 | 2200 | 26.4K |
| 10 | 1d2h | 1.52M | 1037 | 15 | 256 | 3000 | 36K |
| 11 | 1d6h | 2M | 1259 | 19 | 225 | 4000 | 36K |
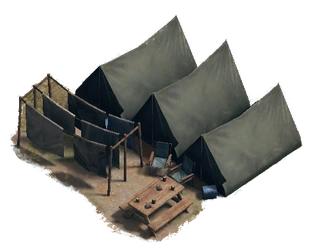
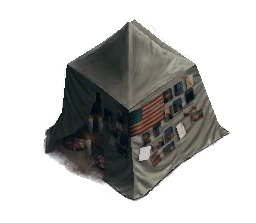
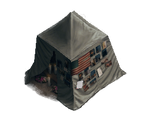
Tents
Tents produce XP useful for upgrading your equipments and train your survivors. They are unlocked at council's level X, X, and 22.
| Upgrade to level | Time | Cost | Gold Cost | Council level | BP | XP/Hour | Storage |
|---|---|---|---|---|---|---|---|
| 1 | 15m | 400 | 4 | 2 | 0 | 30 | 240 |
| 2 | 45m | 2800 | 28 | 2 | 16 | 80 | 640 |
| 3 | 1h 30m | 6500 | 43 | 3 | 25 | 180 | 1440 |
| 4 | 5h | 32K | 119 | 49 | 340 | 3060 | |
| 5 | 7h 30m | 79K | 227 | 81 | 540 | 4860 | |
| 6 | 13h | 240K | 373 | 10 | 121 | 800 | 8000 |
| 7 | 18h | 610K | 578 | 12 | 169 | 1100 | 11,000 |
| 8 | 1d | 1.13M | 859 | 14 | 270 | 1400 | 16800 |
| 9 | 1d4h | 2.12M | 1308 | 16 | 320 | 1700 | 20400 |
| 10 | 1d10h | 4M | 2159 | 18 | 410 | 2000 | 24000 |
| 11 | 2d | 6M | 3081 | 19 | 450 | 3000 | 24000 |
Note: since version 2.2 the XP Tents permanently give twice as much XP as before. The old "XP/Hour" and "Storage" values are marked with a strikethrough until updated.
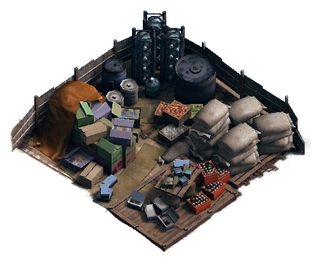
Supplies storage
Store all your food. You need to transfer your food from farm plot to supply storage or else farm stop producing. They are unlock at council level X, 4, 10, and 16.
| Level | Time | Cost | Gold Cost | Council level required | BP | Storage |
|---|---|---|---|---|---|---|
| 1 | 1m 30s | 400 | 2 | 2 | 7 | 2500 |
| 2 | 22m 30s | 2.4K | 22 | 3 | 13 | 10K |
| 3 | 1h | 4.9k | 36 | 4 | 20 | 30K |
| 4 | 4h | 30K | 107 | 6 | 39 | 70K |
| 5 | 6h | 75K | 208 | 8 | 65 | 140K |
| 6 | 9h | 210K | 328 | 10 | 97 | 280K |
| 7 | 15h | 490K | 500 | 12 | 135 | 560K |
| 8 | 21h | 1.07M | 807 | 14 | 180 | 1.12M |
| 9 | 1d2h | 2.04M | 1269 | 16 | 231 | 2.24M |
| 10 | 1d 6h | 3.75M | 2039 | 18 | 284 | 4.48M |
| 11 | 1d 6h | 6M | 3043 | 22 | 250 | 5M |

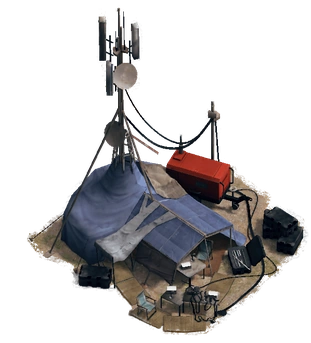
Radio Tent
Send a call out for more survivors here. Calls can be made with 1, 5, or 15 radios, with an increase in star value to the summoned survivor.The level of the radio tent determines the summoned survivor's starting level and their maximum level. When you summon survivors, the number of stars determine the number of levels you can upgrade your survivor, 2 levels for each star. The Radio Tent level is the only thing that effects survivor call min/max level.
In the latest update 1.5 The maximum (Cap) lvl for a survivor (from a radio call) is 20, but the highest you can train one is 15. You can get survivor with a current (starting) lv higher than 15 in rescue missions.
Notes
Rejecting a 1star character gets you 2 tokens. Rejecting a 2star character gets you 8 tokens. Rejecting a 3star character gets you 32 tokens.
Comparing "Choose from 2" call costing 10 radio phones. with "Choose from 3" call costing 15 radio phones. (not factoring in increased chance of hero tokens)
- three "Choose from 2" calls (costing 3 x 10 = 30 radio phones) = 3calls x probably 2star (8 tokens) = 24 tokens
- two "Choose from 3" calls (costing 2 x 15 = 30 radio phones) = 2 calls x probably 3star (32 tokens) = 64 tokens
A new version of the radio calls is being worked on. I think you'll like it. Details to follow.
Not yet in 1.6. Just wanted to let you know that we know you guys feel like the radio calls could be improved, and we're now working on it. OldGoth Moderator, Staff 2016 February
From
http://forums.nextgames.com/walkingdead/discussion/3183/radio-tent-seriously/p1
Is there a maximum number of radio you can have? There is a hard limit, but it's very high indeed; 999 999. So unfortunately you won't be able to get to a million phones. from http://forums.nextgames.com/walkingdead/discussion/4135/is-there-a-limit-on-the-of-radios-i-can-haz#latest
| Level | Time | Cost | Gold Cost | Council level required | BP | Initial level survivors |
|---|---|---|---|---|---|---|
| 1 | 15s | 300 | 1 | 3 | 19 | 1-3 |
| 2 | 2h 15m | 7.6k | 51 | 4 | 30 | 1-5 |
| 3 | 6h30m | 33K | 135 | 6 | 59 | 2-6 |
| 4 | 10h 30m | 81K | 255 | 8 | 97 | 3-8 |
| 5 | 15h | 270K | 402 | 10 | 145 | 4-10 |
| 6 | 21h | 710K | 647 | 12 | 203 | 5-12 |
| 7 | 1d 2h | 1.26 M | 921 | 14 | 270 | 6-14 |
| 8 | 1d 6h | 2.35M | 1415 | 16 | 447 | 7-16 |
| 9 | 1d14h | 4.25M | 2160 | 18 | 583 | 7-17 |
| 10 | 1d19h | 6M | 3068 | 19 | 680 | ?-18 |
High level players agree that you should only use 15 calls, and to wait as long as you can before doing them, ideally when your tent is at the maximum level, or at least level 5.
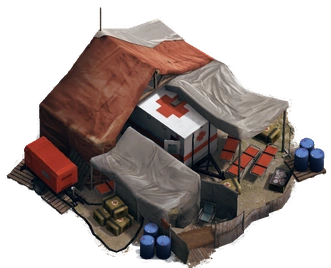
Hospital
Survivors hurt during missions come here to heal. Time is reduced by increasing hospital level and extra slots for survivors are added at certain level upgrades.
| Level | Time | Cost | Gold Cost | Council level | BP | Time reduction | Healing Slots |
|---|---|---|---|---|---|---|---|
| 1 | 3s | - | - | - | 4 | - | 1 |
| 2 | 45m | 2.8K | 28 | 3 | 16 | 2 min | 1 |
| 3 | 4h | 17k | 83 | 5 | 36 | 5 min | 2 |
| 4 | 6h | 56K | 172 | 7 | 64 | 10 min | 2 |
| 5 | 11h | 140K | 312 | 9 | 100 | 15 min | 2 |
| 6 | 15h | 430K | 474 | 12 | 144 | 20 min | 3 |
| 7 | 21h | 860K | 713 | 13 | 196 | 30 min | 3 |
| 8 | 1d2h | 1.52M | 1037 | 15 | 256 | 40 min | 3 |
| 9 | 1d6h | 2.75M | 1593 | 17 | 324 | 50 min | 3 |
| 10 | 1d14h | 5.75M | 2948 | 19 | 400 | 60 min | 3 |
| 11 | 2d | 7M | 3527 | 21 | 550 | 75 min | 3 |
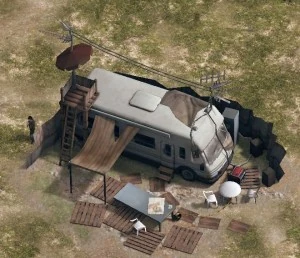
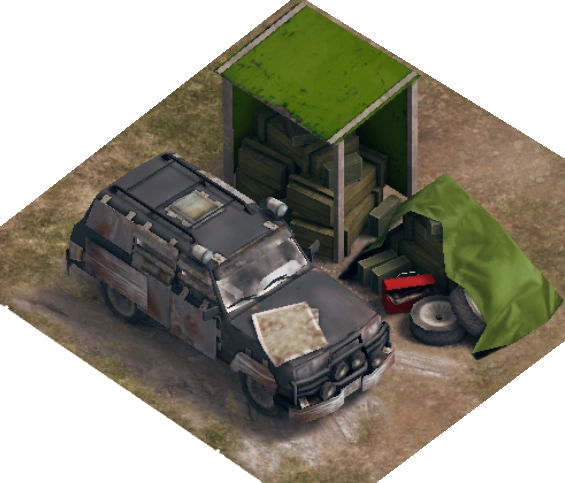
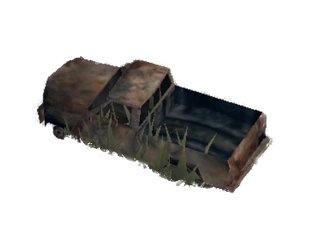
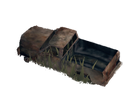
Mission car
The level of your mission car determines how much Gas you can spend in missions and how much Gas you can store.
Note: Normally you can't use a facility if it's upgrading nor upgrade while it's in use (e.g. training in camp or healing in hospital). The car is an exception, you will be able to go on missions also during car upgrade.
| Level | Time | Cost | Gold Cost | Council level | BP | Gas storage |
|---|---|---|---|---|---|---|
| 1 | 3s | - | - | - | 4 | 6 |
| 2 | 10m | 500 | 10 | 3 | 16 | 9 |
| 3 | 4h | 17K | 83 | 5 | 36 | 11 |
| 4 | 6h | 56K | 172 | 7 | 64 | 13 |
| 5 | 11h | 140K | 312 | 9 | 100 | 15 |
| 6 | 15h | 430K | 474 | 11 | 144 | 17 |
| 7 | 21h | 860K | 713 | 13 | 196 | 19 |
| 8 | 1d2h | 1.52M | 1037 | 15 | 256 | 21 |
| 9 | 1d6h | 2.75M | 1593 | 17 | 324 | 23 |
| 10 | 1d14h | 5.75M | 2948 | 19 | 400 | 25 |
| 11 | 2d | 7M | 3527 | 20 | 500 | 27 |
| 12 | 2d | 12M | 5850 | 22 | 600 | 29 |

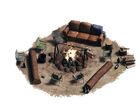
Campfire
The campfire can't be upgraded and it serves only to tell information about the current story mission.
Memorial
The memorial is unlocked at council level 4 and shows information about survivor(s) you lost in deadly missions. There seems to be no game-advancing benefit of this building, apart from a possible amount of BP when building it. Good luck!
Junk
This is not actual buildings, but bushes or wrecks found in your camp initially. You may clear it to make room for your buildings or for aesthetic reasons.
Clearing the area will cost you Supplies (such as 100 or 6500, up to 15k) and some time (e.g. 10s). There seems to be no BP advantage (at least not for small cost clearing).

Outpost
Allows you to do an Outpost Raid and also to be raided by other players. You can gain or lose influence in raid, at some point you can also gain or lose Trade Goods. The Outpost building is where you can set your defenders and change your Outpost Configurations for defense. Being raided and losing results in loss of your current influence points.
| Level | Time | Cost (supplies) | Gold cost | Council level required | BP | Trade goods/hour | Holds trade goods | Unlocks | |
|---|---|---|---|---|---|---|---|---|---|
| 1 | 5s | 1K | 4 | 50 | 400 | Lake map | |||
| 2 | 11h | 140K | 312 | 6? | 74 | 55 | 440 | Warehouse map
* | |
| 3 | 15h | 430K | 474 | 8 | 111 | 60 | 480 | Town map
** | |
| 4 | 21h | 860 | 713 | 10 | 161 | 65 | 520 | Quarrytop map | |
| 5 | 1 day | 1.52M | 1037 | 12 | 219 | 70 | 560 | RuralField map |
* Lv2 allows you to work with the map editor and change your map tiles.
** LV3 outpost allows you to individually place your survivors and set them on offense, defense, or stationary modes. It also give the option to change defenders
Higher level map allow to place more walkers on the map, the walkers have to be captured & upgraded in the walker Pit.
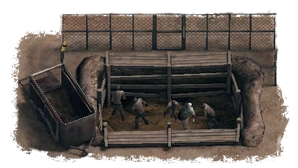
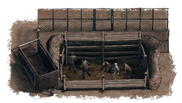
Walker Pit
The walker pit is located just outside the camp walls and is used to capture walkers that will defend your outpost. Technically the walker pit does not come from the same source as the camp walkers. The initial amount available is 4 normal walkers of level 1 and you can use Trade Goods or Gold to increase both amount and level of them.
The level of the Walker Pit itself does not directly affect the walkers, but instead how many and the level it can hold. Note that the value in the table below are the maximum walkers, you need to upgrade or capture separately to reach that max.
The Outpost building level decides which maps are available, the map selected defines how many walkers you can have in the outpost defense. To make use of the higher amount of walkers a suitable map needs to be chosen too.
| Level | Time | Cost (in supplies) | Gold Cost | Council level required | BP | Max walkers |
|---|---|---|---|---|---|---|
| 1 | 5s | 1 k | 3 | 5 Normal LV4
1 Armored LV4 1 Tank LV4 | ||
| 2 | 5m | 17 k | 5 | 6 Normal LV5
1 Armored LV5 1 Tank LV5 | ||
| 3 | 5h | 140 k | 264 | 7 | 59 | 7 Normal LV7
2 Armored LV7 1 Tank LV7 |
| 4 | 6h | 210 k | 304 | 9 | 77 | 8 Normal LV9
2 Armored Lv9 1 Tank LV9 |
| 5 | 11h | 430 k | 442 | 11 | 120 | 9 Normal LV 11
2 Armored LV 11 2 Tank LV 11 |
| 6 | 15h | 710 k | 599 | 13(?) | 173 | 10 Normal LV 13
2 Armored LV 13 2 Tank LV 13 |
| 7 | 21h | 860 k | 713 | 13 (?) | 235 | 11 Normal LV15
3 Armored Lv15 2 Tank LV15 |
| 8 | 1d2h | 1.52 M | 1037 | 15 | 307 | 12 Normal LV17
3 Armored Lv17 2 Tank LV17 |
| 9 | 1d6h | 2.75 M | 1593 | 17 | 389 | 13 Normal LV19
3 Armored Lv19 2 Tank LV |
| 10 | 1d6h | 8 M | 3945 | 21 | 420 | 13 Normal LV20
3 Armored Lv20 Tank LV20 |
| Normal | Armored | Tank | |
|---|---|---|---|
| Walker Level | Upgrade (Goods+time) | Upgrade (Goods+time) | Upgrade (Goods+time) |
| 1 | |||
| 2 | 250 + 5m | 250 + 2m30s | |
| 3 | 250 + 7m30s | 500 + 7m30 | 500 + 7m30s |
| 4 | 500 + 11m15s | 750 + 22m30s | 750 + 11m15s |
| 5 | 750 + 18m45s | 1000 + 37m30s | 1000 + 22m30s |
| 6 | 1000 + 22m30s | 1500 + 45m | 1500 + 22m30s |
| 7 | 1250 + 30m | 2000 + 1h | 2000 + 30m |
| 8 | 1500 + 37m30s | 3000 + 1h15m | 3000 + 37m30s |
| 9 | 2000 + 48m45s | 4000 + 1h37m | 4000 + 48m45s |
| 10 | 2500 + 56m15s | 5,000 + 1h52m
Gold Cost 1022 |
5000 + 56m15s |
| 11 | 3000 + 1h7m | 6000 + 2h15m
Gold Cost 1225 |
6000 |
| 12 | 3500 + 1h18m
Gold Cost 717 |
7000 + 2h37m Gold Cost 1428 |
7000 + 1h18m
Gold Cost 1417 |
| 13 | 4000 + 1h33m
Gold Cost 819 |
7,500 + 3h07m Gold Cost |
7,500 + 1h33m Gold Cost 1519 |
| 14 | 4500 + 1h45m
Gold Cost 921 |
7500 + 3h30m Gold Cost 1535 |
7500 + 1h 45m
Gold Cost 1521 |
| 15 |
5000 + 2h Gold Cost 1023 |
7500 + 4h Gold Cost 1539 |
7500 + 2h
Gold Cost 1523 |
| 16 |
5500 + 2h15m Gold Cost 1125 |
7500 + 4h 30m
Gold Cost 1543 |
7500 + 2h 15m
Gold Cost 1525 |
| 17 |
6000 + 2h33m Gold Cost 1227 |
7500 + 5h 7m
Gold Cost 1548 |
7500 + 2h 33m
Gold Cost 1527 |
| 18 | (Walker Pit level 9 required) 6500 +
Gold Cost 1309 |
7500 + 5h 37m
Gold Cost 1552 |
7500 + 2h48m Gold Cost 1529 |
| 19 | 7000 + 3h7m
Gold Cost 1432 |
7500 + 6h 15m Gold Cost 1557 |
7500 + 3h7m
Gold Cost 1531 |
| 20 | (Walker Pit level 10 required)
7500 + 4h11m Gold Cost 1540 |
(Walker Pit level 10 required)
7500 + 8h22m Gold Cost 1574 |
(Walker Pit level 10 required)
7500 + 4h11m Gold Cost 1540 |
| 21 | 9500 + 9h
Gold Cost 1979 |
10.5K + 5h
Gold Cost 2147 | |
| 22 | 12.5K + 9h
Gold Cost 2579 |
||
| 23 | 15.5K + 9h
Gold Cost 3179 |
17.5K + 6h 15m
Gold Cost 3557 | |
| 24 | 21.5K + 7h
Gold Cost 4363 | ||
| 25 | 25.5K + 7h
Gold Cost 5163 | ||
| 26 | 30K + 7h
Gold Cost 6063 |
| Normal | Armored | Tank | |
|---|---|---|---|
| Walker | Catch (Goods) | Catch (Goods) | Catch (Goods) |
| 1 | - | 1000 | 5000 |
| 2 | - | 2500 | 7500 |
| 3 | - |
5000 (Walker Pit level 7 required) |
|
| 4 | - | ||
| 5 | 1500 | ||
| 6 | 2000 | ||
| 7 | 3000 | ||
| 8 | 4000 | ||
| 9 | 5000 | ||
| 10 | 5500 | ||
| 11 | 6000 | ||
| 12 | 6500 (Walker Pit level 8 required) | ||
| 13 | 7000 (Walker Pit level 9 required) | ||
| 14 | (Walker Pit level 10 required) |
References
- Most images apparently from http://www.dojagaming.de/spiele-apps/the-walking-dead-no-man-s-land/ (just redirects to homepage; redirect noticed 2018 March)(apparently not archived at archive.org's Wayback Machine)